I Mistook gpt-oss for an Image Generator. Now My Mac Runs FLUX Offline.
I asked gpt-oss for an image, realised it cannot do that, and ended up with FLUX running on my Mac through Draw Things and a tiny curl pipeline. A full walkthrough so you do not repeat my mistakes.
I Mistook gpt-oss for an Image Generator. Now My Mac Runs FLUX Offline.
TL;DR - I went down a small rabbit hole today after asking if gpt-oss could generate images. It cannot. It is a text-only language model. That detour ended with FLUX.1-schnell running locally on my Mac through Draw Things, exposed over a tiny HTTP API, and a one-line shell function I can call from anywhere. The hero image above? Generated by that exact setup. Below is the full walkthrough so anyone can replicate it without bumping into the same walls I did.
So there I was, casually asking my local LM Studio if I could just hand it a prompt and get an image back.
Spoiler: no.
I was running gpt-oss locally and somehow expected it to also handle image generation. Which, in hindsight, is a bit like asking your calculator to play music. gpt-oss is a text-only language model. It generates tokens, not pixels. There is no image head bolted onto it. I knew this. I had just convinced myself otherwise for a few minutes.
Anyway, that small confusion sent me looking at what it would actually take to do local image generation on my Mac. Pollinations.ai already covers most of my blog hero images, but it goes over the wire. I wanted something offline. Something I could call from a script when there is no internet. Something that uses the same FLUX family of models pollinations is built on, just running on my own hardware.
What I ended up with surprised me a little. The setup is simpler than I expected. The latency is worse than I expected. And the conclusion is more boring than I expected.
Let me walk you through every step.
Why Draw Things and not ComfyUI
If you have read anything about local image generation, ComfyUI shows up first. It is the node-based, fully-featured, every-knob-exposed option. Power users love it. I did not pick it.
Reason is simple. I wanted the lowest-friction path to find out “do I even need this.” ComfyUI on Mac means Python environments, model downloads, a queue server, custom workflow JSON, and a web UI to drive it. That is a lot of setup just to discover I would only use it once a month.
Draw Things is the opposite of that. Free Mac App Store app. Native Apple Silicon. Built-in model manager. Click, install FLUX.1-schnell, click generate, done. The trade-off is less control. You get the knobs Draw Things decides to expose. For my use case, that was fine.
Tell me I am not the only one who picks the easier option first and only graduates to the harder one when the easier one breaks. That is basically my entire approach to tooling.
Step 1: Install Draw Things from the Mac App Store
Open the Mac App Store, search for “Draw Things”, and pick the one by Draw Things, Inc. with the astronaut-on-horseback icon. There are a few image apps with similar names floating around, so confirm the developer before clicking install.
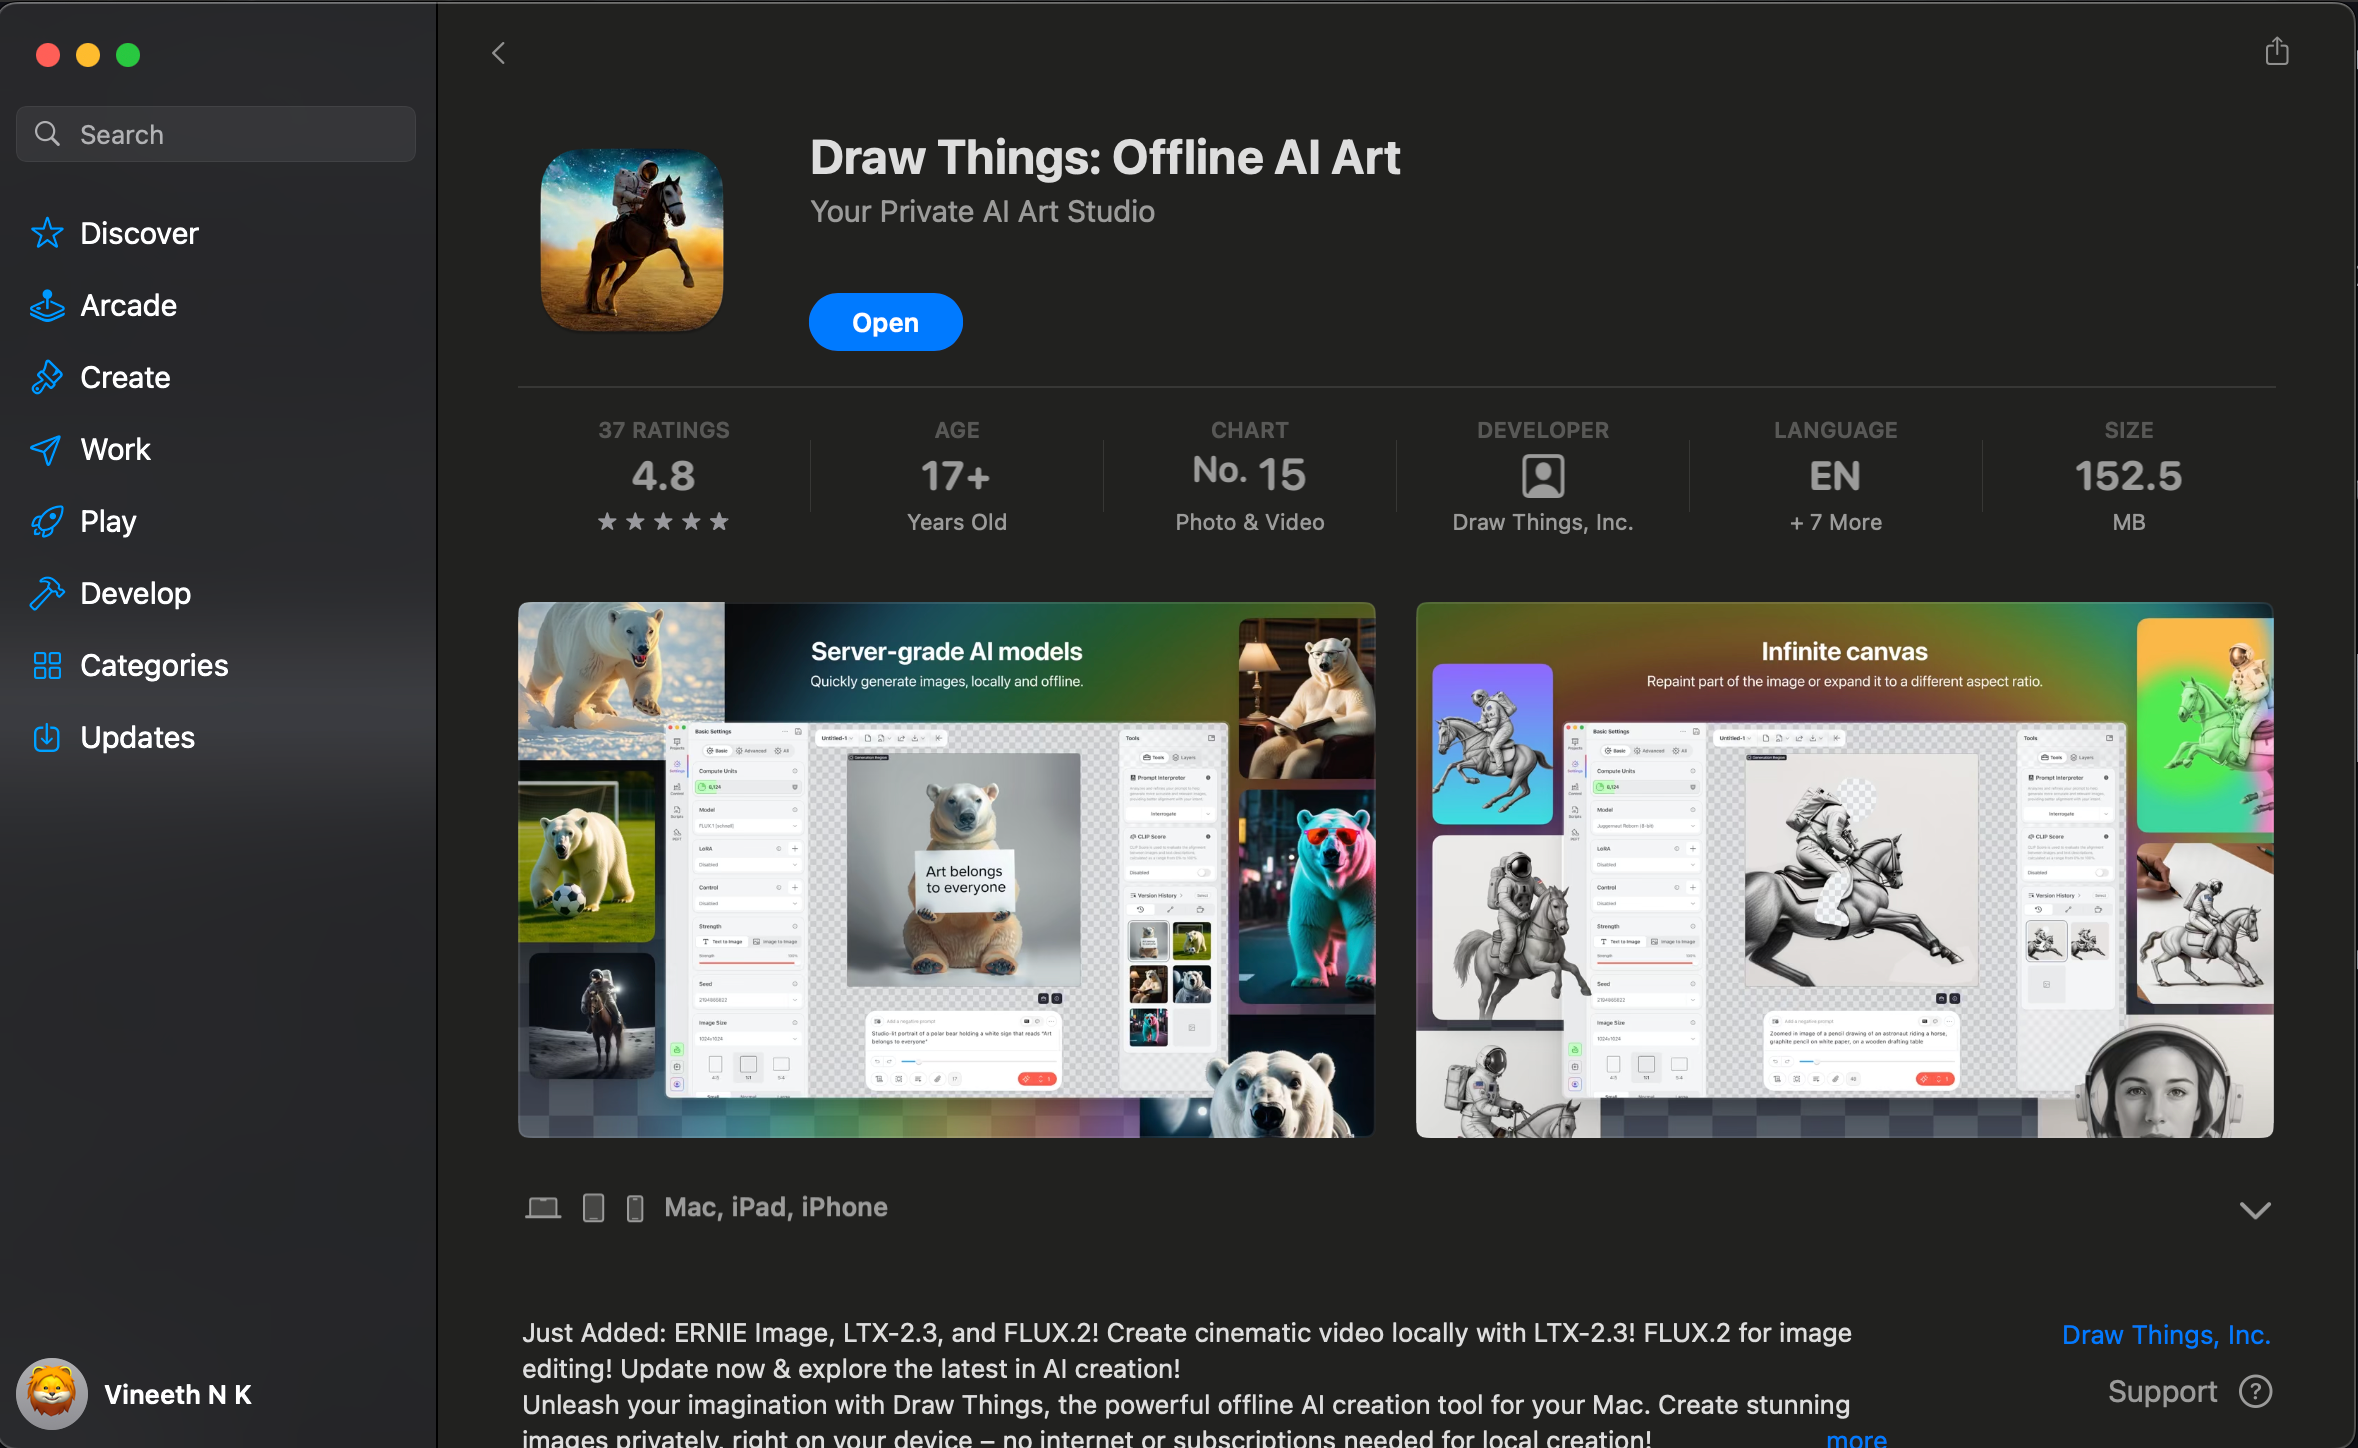
Things worth noting from the listing:
- Size: about 152 MB. The app itself is small. The big downloads happen later when you pick a model.
- Platforms: Mac, iPad, iPhone. Universal app, so the same purchase works across devices.
- Price: free.
- Update cadence: active. Mine had just added FLUX.2, LTX-2.3 and a few others on my install day. New models keep landing.
Click Open after install. The app launches into a blank canvas with a settings panel on the left and a tools panel on the right. We are not generating anything yet. First we need a model.
Step 2: Pick the model, FLUX.1 [schnell]
In the left settings panel, switch to the All tab at the top. Scroll till you find the Model dropdown. Click it. You will get a search field plus two sections, Local and Official Models.

Pick FLUX.1 [schnell]. If it is not in your Local section yet, it will be in Official Models with a small download cloud icon. Click the cloud, wait for it to pull down (it is a few gigs, so go make tea), and once it lands it moves into Local.
Why schnell and not the dev variant? Two reasons.
- Speed. schnell is the 4-step distilled version. dev needs 20 to 50 steps for the same quality. On a Mac, that difference is the gap between “I can use this” and “I will never use this.”
- License. schnell is Apache 2.0. dev is non-commercial. If you ever want to ship anything you generated, schnell is the safer pick.
The other models in that list, LTX-2.3, ERNIE Image, the various distilled and quantized variants, are tempting but ignore them for now. Schnell is the one that maps cleanly to what Pollinations runs in the cloud, and it is the smallest path to a working pipeline.
Step 3: First image through the GUI
Before touching the API, run one image through the app itself. This confirms the model is loaded, the engine works, and your machine has the juice for FLUX.
Type a prompt into the box at the bottom of the canvas. I went with a tired developer at a laptop late at night, glowing monitor, moody lighting. Click the small button with the sparkle icon at the bottom right. Wait. Watch the progress.
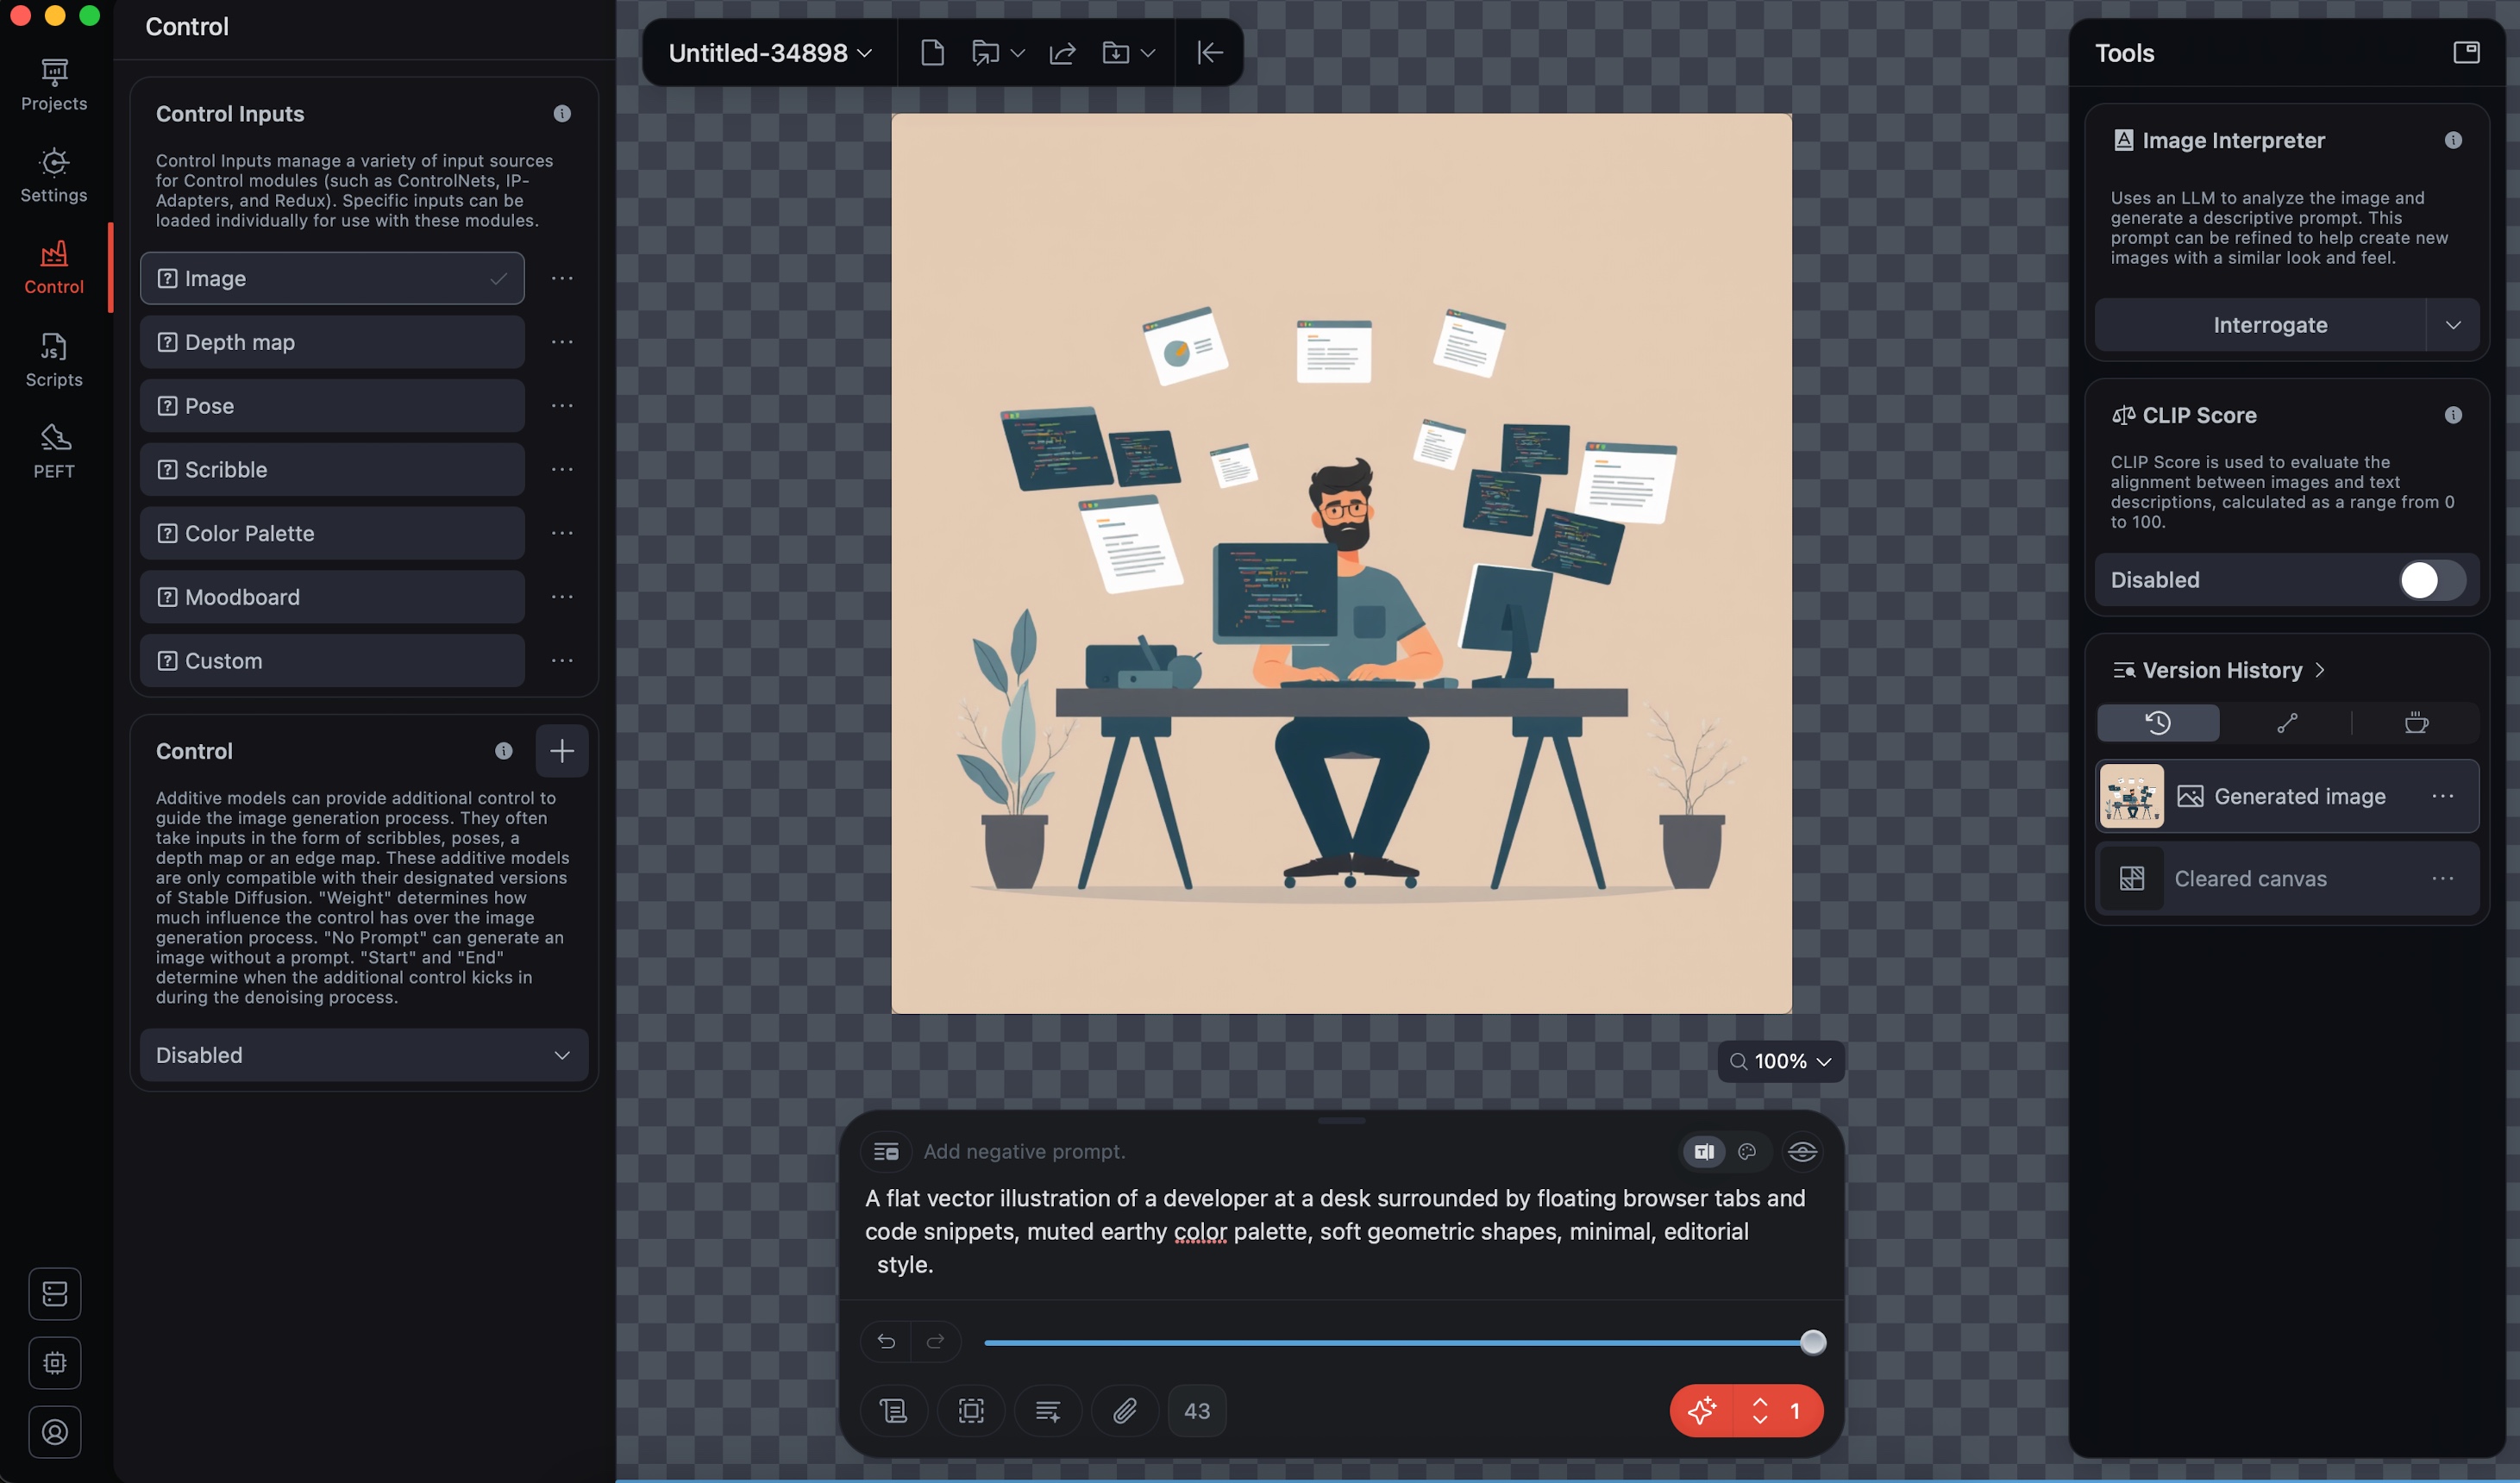
Forty seconds later, an image. Mine came out as the tired developer above, lit by a green glow from a monitor in the dark. Not bad for clicking three buttons.
A few things I noticed during the first run:
- The app uses your GPU. Activity Monitor will show a spike. Fan may kick in on smaller MacBooks.
- First generation after launch is slower because the model has to warm up. After that it stabilises.
- The output saves to wherever you set “Save Generated Media to” in settings. Mine goes to
~/Pictures/Flux Images. Worth setting this once so you can find your generations later.
If this step works, the GUI half is done. The next step is to make the same engine reachable from a terminal.
Tell me you also did the small “I touched the button and it worked” celebration the first time the image rendered. There is something satisfying about watching pixels appear out of math on your own laptop.
Step 4: Flip the HTTP API switch
Draw Things has a built-in HTTP API server. It is off by default. Once you turn it on, it speaks the Stable Diffusion WebUI API spec, which means anything that can talk to AUTOMATIC1111 can talk to Draw Things instead. Same endpoints, same JSON shape, mostly the same parameters.
Open Settings (the gear icon on the left rail), go to the Advanced tab, and scroll down to API Server. You will see a panel like this.
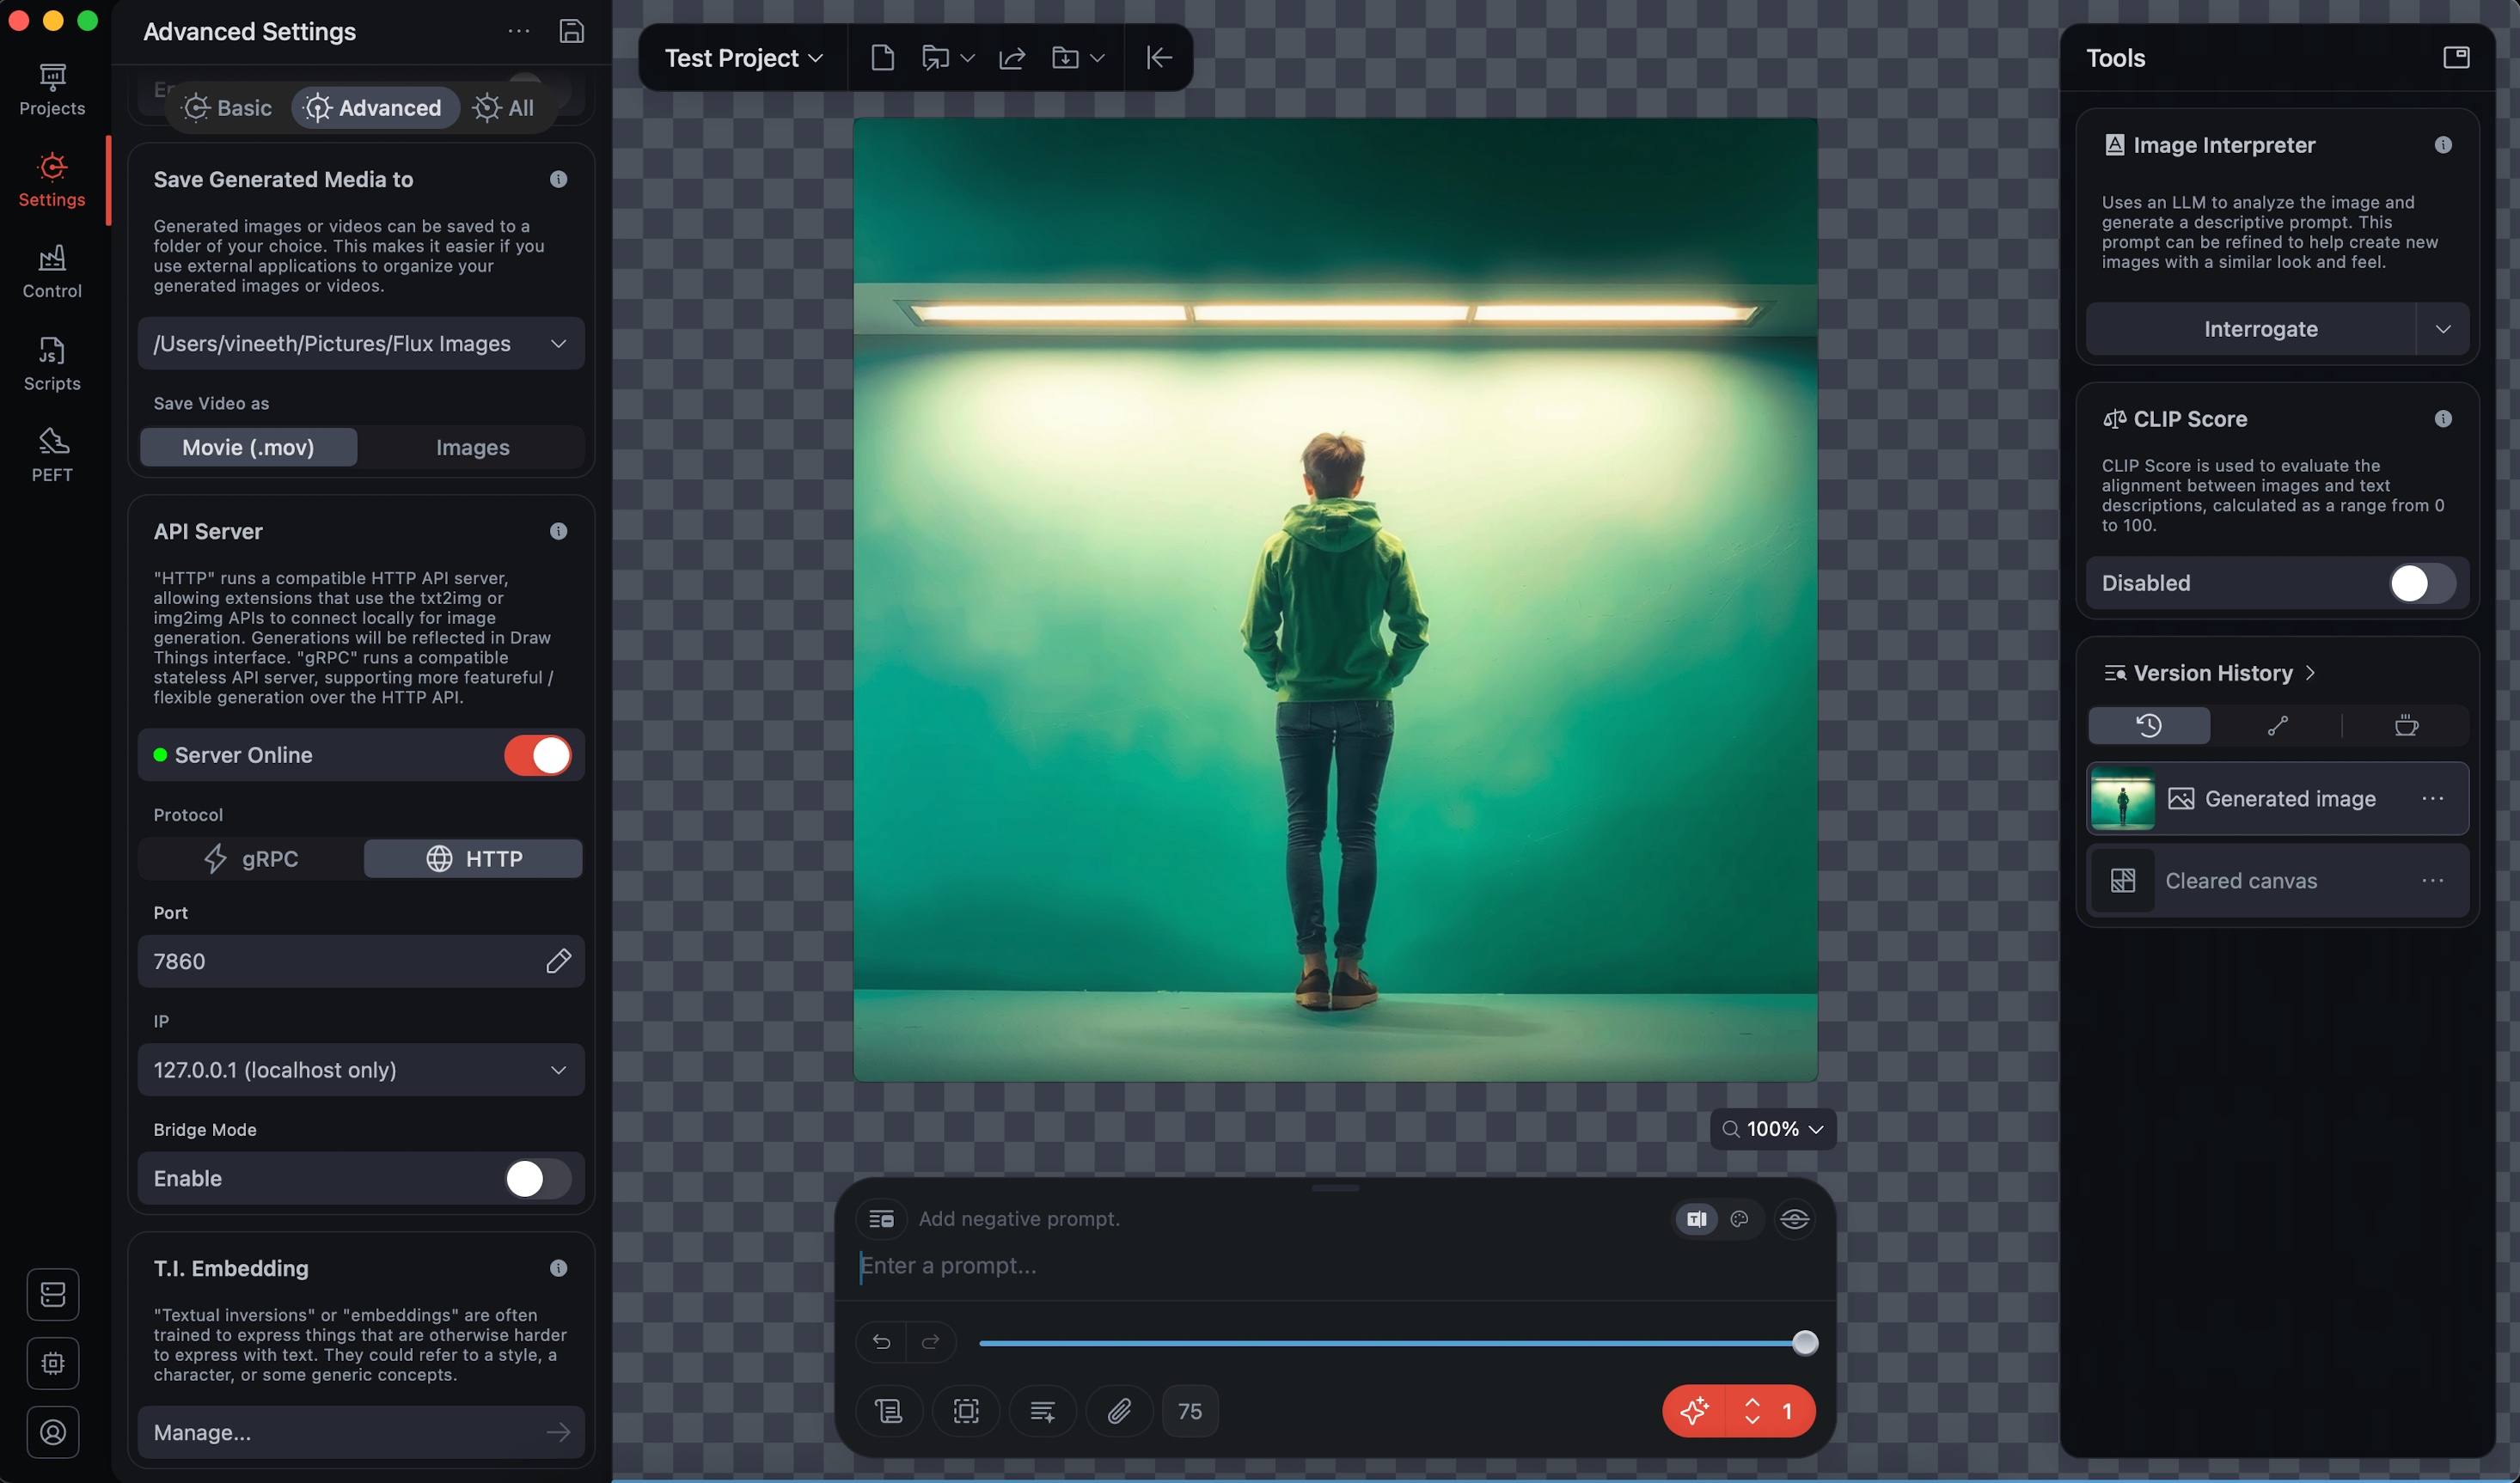
Four switches matter here. Get them right or the curl will hang silently and you will spend an hour wondering why.
| Setting | Value | Why |
|---|---|---|
| Server Online | On (green) | The actual on/off for the server. |
| Protocol | HTTP, not gRPC | Draw Things ships both. gRPC needs protobuf clients. HTTP is what curl, jq, and any normal script can talk to. This is the most common mistake. |
| Port | 7860 | Same as the WebUI default. Anything assuming AUTOMATIC1111 will hit this without config. |
| TLS | Off | It is local-only. Self-signed certs just break curl with no real benefit. |
| IP | 127.0.0.1 (localhost only) | The default is “allow all connections” which exposes the server to your whole network. No reason for that. Lock it to localhost. |
Bridge Mode you can leave disabled. That is for routing through Draw Things’ cloud, which defeats the whole “offline” point.
Once those four are right and the toggle dot is green, you have an HTTP API live on http://127.0.0.1:7860.
Step 5: The first sanity check, and the first gotcha
I wanted to confirm the server was alive before sending a real prompt. The standard move in the Stable Diffusion world is to hit /sdapi/v1/sd-models, which returns the list of installed models.
curl -s http://127.0.0.1:7860/sdapi/v1/sd-modelsI got back a clean 404.
A few minutes of confusion later, I figured it out. Draw Things implements the actually-useful endpoints, mainly /txt2img and /img2img. It does not bother with the introspection ones. The model is whatever you have loaded in the app at that moment, and they did not see the point of duplicating that into an API call.
Which is fine, but it does mean the usual “is the server alive” check from Stable Diffusion world does not work here. The way you actually verify the server is up is by sending a real generation request and seeing what comes back.
If you ever hit this 404 yourself, you now know. It is not your config. It is just an endpoint Draw Things chose not to ship.
Step 6: A real generation request
Here is the smallest curl that gets you a working image.
curl -s -X POST http://127.0.0.1:7860/sdapi/v1/txt2img \
  -H "Content-Type: application/json" \
  -d '{
    "prompt": "a red apple on a wooden table",
    "steps": 4,
    "width": 512,
    "height": 512,
    "cfg_scale": 1.0
  }'
The response is JSON with a base64-encoded PNG inside the images array. Not a binary stream, not a multipart upload, just a JSON blob with the picture stuffed inside as base64. So the full path from prompt to viewable file is:
curl -s -X POST http://127.0.0.1:7860/sdapi/v1/txt2img \
  -H "Content-Type: application/json" \
  -d '{"prompt":"a red apple","steps":4,"width":512,"height":512,"cfg_scale":1.0}' \
  | jq -r '.images[0]' | base64 -d > /tmp/apple.png && open /tmp/apple.png
Run that and you get a session that looks roughly like this.
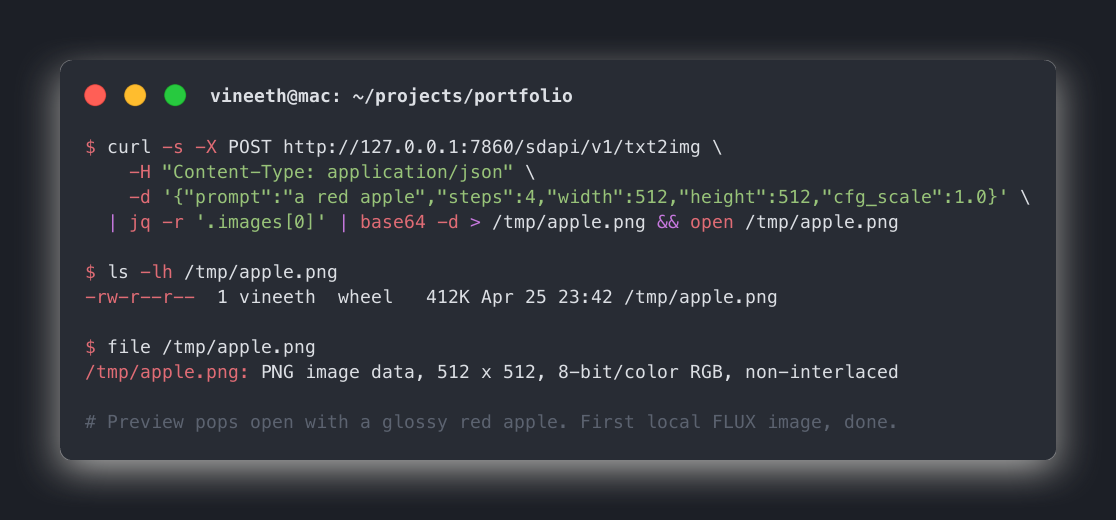
The first time I ran that and Preview popped open with an actual apple, I just sat back and smiled. These small wins are why I still enjoy this whole thing.
A few notes on the parameters:
- steps: 4 is the magic of FLUX.1-schnell. Most diffusion models need 20 to 50 steps. Schnell is distilled to do good work in four. If you push it higher, it will not get noticeably better, just slower.
- cfg_scale: 1.0 is correct for schnell. Higher values that work for SD1.5 or SDXL will produce burnt, oversaturated images here. Leave it at 1.
- width and height must be multiples of 64. 512x512 is the sweet spot for testing. Blog hero size 1200x630 works but is slower (more on that below).
Step 7: Anatomy of the JSON response
If you run the curl without piping into jq, you will see something like this (truncated, because the base64 string is enormous).
{
  "images": [
    "iVBORw0KGgoAAAANSUhEUgAAAgAAAAIACAIAAABLbSncAAA...{thousands more chars}...AAElFTkSuQmCC"
  ],
  "parameters": {},
  "info": ""
}
Three things to know.
imagesis an array. If you ask for a batch ("batch_size": 4), you get four base64 strings back. Most of the time you only want index zero.parametersandinfocome back empty in Draw Things. The Stable Diffusion WebUI fills these. Draw Things is implementing only what it implements, no more.- The base64 string is the entire PNG, including headers.
iVBORw0KGgois the magic prefix for PNG when base64-encoded. If you ever see that, you know you got a valid image and not an error JSON.
That last point is useful for debugging. If something is off, the response will not start with iVBORw, it will start with { and be a small JSON with an error. Pipe to head -c 20 if you want to peek.
Step 8: The data flow, end to end
Here is the whole pipeline from typing a prompt to opening a PNG, in one diagram.
your terminal                   Draw Things (Mac app)
     |                                  |
     |  POST /sdapi/v1/txt2img          |
     |  { prompt, steps, w, h, cfg }    |
     | -------------------------------> |
     |                                  |
     |                                  |  FLUX.1-schnell
     |                                  |  runs on GPU
     |                                  |  (Apple Silicon)
     |                                  |
     |  { "images": ["base64..."] }     |
     | <------------------------------- |
     |                                  |
     | jq -r '.images[0]'  -> base64    |
     | base64 -d           -> raw PNG   |
     | > /tmp/apple.png    -> file      |
     | open /tmp/apple.png              |
     |                                  |
     v                                  |
   Preview window pops open
Three tools, each doing one thing, composed into a single line. The Unix philosophy showing up in 2026.
Step 9: Wrap it in a zsh function
I did not want to remember the curl every time, so this went into my ~/.zshrc:
dt-gen() {
local prompt="$1"
local out="${2:-/tmp/dt-$(date +%s).png}"
curl -s -X POST http://127.0.0.1:7860/sdapi/v1/txt2img \
-H "Content-Type: application/json" \
-d "$(jq -n --arg p "$prompt" \
'{prompt:$p, steps:4, width:1024, height:1024, cfg_scale:1.0}')" \
| jq -r '.images[0]' | base64 -d > "$out" && open "$out"
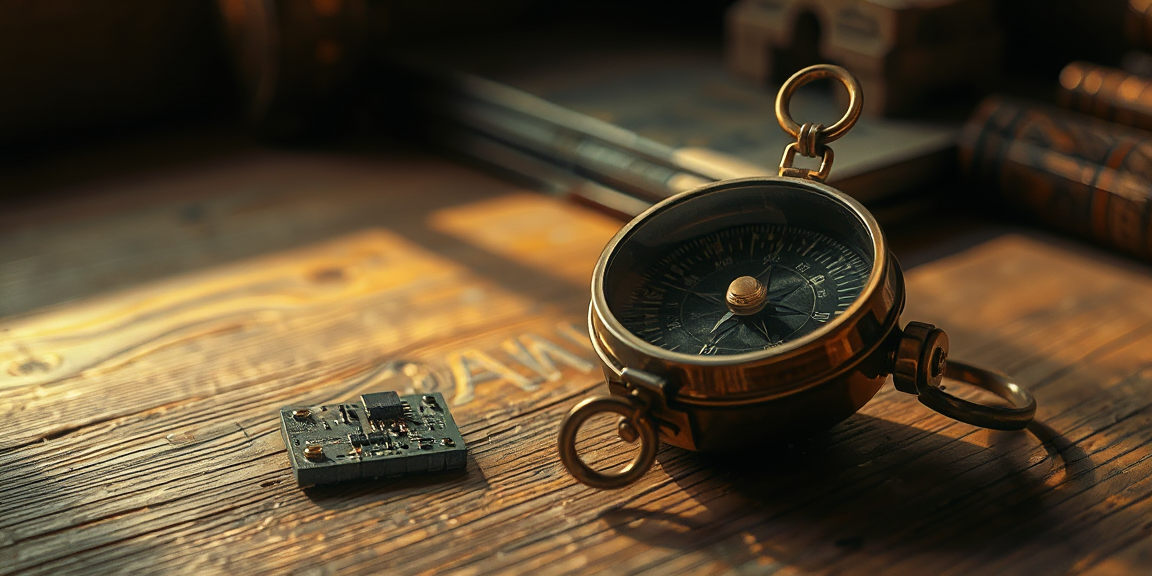
}Now dt-gen "a brass compass on weathered wood, cinematic, 50mm" from any terminal generates the image, saves it, opens it. Nothing fancy. Just a curl wrapped in a function so I do not have to think about JSON escaping every time.
For blog hero images I use a slightly different variant that hits 1200x630.
dt-hero() {
  local prompt="$1"
  local out="${2:-/tmp/hero-$(date +%s).png}"
  curl -s -X POST http://127.0.0.1:7860/sdapi/v1/txt2img \
    -H "Content-Type: application/json" \
    -d "$(jq -n --arg p "$prompt" \
      '{prompt:$p, steps:4, width:1200, height:630, cfg_scale:1.0}')" \
    | jq -r '.images[0]' | base64 -d > "$out" && open "$out"
}
After saving, run source ~/.zshrc (or open a new terminal) and the function is available.
One catch worth knowing. Draw Things must be open with the API server running for these to work. Quit the app, the server stops. I do not have a launcher trick for this yet, and honestly for ad-hoc use it is fine. If I need it, I open the app first. The same way I open Postman before hitting an API while developing.
Speed reality, the part the demos do not show
Now the bit nobody puts in the demo videos. Local image generation on a laptop is slow. Not “wait a beat” slow. Slow enough that you can make tea.
Here is what I measured on my machine.
| Image size | Steps | FLUX.1-schnell on Mac | Pollinations cloud |
|---|---|---|---|
| 512 x 512 | 4 | ~40s | ~6s |
| 768 x 768 | 4 | ~75s | ~7s |
| 1024 x 1024 | 4 | ~110s | ~8s |
| 1200 x 630 (blog hero) | 4 | ~90 to 150s | ~8s |
The hero image at the top of this blog took the upper end of the 1200x630 row. I generated it via the same API while writing this section.
Pollinations comes back in under ten seconds for any of these. The reason is simple. They are running on actual GPU servers, and I am running on an M-series chip. FLUX is the same FLUX. The hardware is what changes.
This is the part where I had to be honest with myself. If I am drafting a blog and want to iterate on hero prompts, two minutes per attempt will ruin the flow. If I am running a one-off script overnight, two minutes is nothing. So the decision is not “which one do I use”, it is “which one suits the moment.”
Troubleshooting matrix
Every problem I hit, plus the fix. Save this section, you will need at least one of these.
| Symptom | Likely cause | Fix |
|---|---|---|
curl: (7) Failed to connect to 127.0.0.1 port 7860 | Server toggle is off, or app is closed | Open Draw Things, flip Server Online to green |
404 Not Found on /sdapi/v1/sd-models | Endpoint not implemented in Draw Things | Skip that check. Verify with a real /txt2img request instead |
| Empty response, no error | Protocol set to gRPC | Switch Protocol to HTTP in API Server settings |
| TLS handshake error | TLS toggle is on with self-signed cert | Turn TLS off for local use |
| Hangs forever, no response | First call after launch, model is warming up | Wait 30 to 60 seconds. Subsequent calls are faster |
| Burnt, oversaturated colours | cfg_scale set too high for schnell | Set cfg_scale: 1.0 |
| Output looks like noise / not the prompt | steps set to 1 or 2 | Set steps: 4 for schnell |
width or height not divisible by 64 | Custom size like 600x600 | Round to nearest 64. Use 576 or 640 |
jq: parse error after curl | Response was an HTML error page, not JSON | Run curl without the pipe to see the raw response |
| Image saves but is 0 bytes | base64 decode failed silently | Check that jq -r '.images[0]' returns a string starting with iVBORw |
| Generations are slower than the table above | Other GPU-heavy app open (Final Cut, Blender) | Close them, retry. FLUX wants the GPU to itself |
| Server reachable from other devices on Wi-Fi | IP set to 0.0.0.0 (allow all) | Change IP to 127.0.0.1 (localhost only) |
| App freezes during generation | Tried to switch model mid-generation | Wait for current job to finish before changing model |
Things that bit me along the way
A few smaller gotchas that did not need their own row in the table but are worth calling out.
The app needs to stay open. Draw Things is the API server. Quit Draw Things, the server dies. There is no launchd daemon, no background process. For me this is fine because I batch my image work. If you want a true always-on local server, you are looking at the wrong tool.
Model state matters. The model the API uses is whichever model is currently selected in the app. If you switch models in the GUI, your next API call uses the new one. There is no way to specify a model in the request itself for the schnell endpoint. If you need that, you are graduating to ComfyUI.
Bridge Mode is a different beast. I tried turning Bridge Mode on early because “more options” felt safer. Bridge Mode actually routes the request through Draw Things’ cloud relay, which is the opposite of what I wanted. If you see references to Bridge Mode in the docs, that is a separate feature, not part of the local API path. Leave it off.
Save folder fills up fast. Every generation through the GUI saves to your “Save Generated Media to” folder. After a couple of hours of testing prompts, mine had two hundred PNGs in it. Set up a cleanup script or be ready for finder lag.
Where I actually landed
Here is the part I did not see coming when I started.
I was kind of expecting to switch my blog skill over to use Draw Things. Generate everything locally. No more pollinations. Look at this, it is all on my own hardware, very impressive.
I am not going to do that.
Pollinations stays as the default for the blog. Latency is the deciding factor. When I am writing, I want hero image attempts in seconds, not minutes. Draw Things becomes the ad-hoc tool. Need an image when there is no internet? Use it. Trying out a stubborn prompt that needs ten attempts and I am okay leaving the laptop alone? Use it. Want to run image generation in a longer-running background script? Use it.
Two tools, two clear use cases, no rewiring of anything that already works.
If you have been through a similar “I will replace the working thing with the local thing” detour and ended up keeping both, I would genuinely like to hear it. Misery loves company on this one.
What I am taking away
A few things stuck with me from this whole detour.
The simplest tool that does the job is usually the right starting point. Draw Things over ComfyUI was the right call for me, even though ComfyUI is technically more powerful.
Local does not always mean better. It means different. Speed, control, and privacy all live on a triangle, and you only get to pick two depending on the situation.
Documentation gaps are real. The Draw Things HTTP API is not as well-documented as AUTOMATIC1111, and a lot of what I figured out came from trial and error with curl. If you ever hit the same /sd-models 404 confusion, now you know.
The curl-jq-base64 pipeline is a beautiful little chain. Three tools, each doing one thing, composed into a single line. The Unix philosophy showing up in 2026.
And the smallest one. Sometimes the right answer to “should I do X locally” is “yes, but keep the cloud version too.” Both/and beats either/or more often than I think.
Okay, that is enough from me for today. If any of this saved you some time, that is the whole point of writing it down. Until the next one, take it easy.